WHAT IS HELM?
Helm is used to wrap Kubernetes, it is an open source container orchestration. With helm we can install and update application and services in the cluster.
KUBERNETES:
Kubernetes features are loadbalancing, self-healing, automatic scaling which ensures your applications are responsive to what is expected.
STEP 1:
Today, we will deploy AWS Elastic Kubernetes services using Helm, as well as configuring helm to automate packages. Helm chart are initial configuration of Kubernetes manifest template which are precreated.
This hands-Requirement:
Kubectl installed, eksctl installed, helm installed.
Install the AWS CLI VERSION 2.10.3 and click this link and download this package.
https://docs.aws.amazon.com/cli/latest/userguide/getting-started-install.html
STEP 2:
Download the Amazon EKS kubectl binary.
STEP 3:
curl -o kubectl https://s3.us-west-2.amazonaws.com/amazon-eks/1.23.7/2022-06-29/bin/linux/amd64/kubectl
chmod +x ./kubectl
STEP 4:
Copy the binary to a folder in your "path".
mkdir -p $HOME/bin && cp ./kubectl $HOME/bin/kubectl && export PATH=$PATH:$HOME/bin
STEP 5:
Verify if it's installed.
kubectl version --short --client
STEP 6:
Install eksctl
curl --silent --location "https://github.com/weaveworks/eksctl/releases/latest/download/eksctl_$(uname -s)_amd64.tar.gz" | tar xz -C /tmp
STEP 7:
Move the extracted binary to /usr/local/bin.
sudo mv /tmp/eksctl /usr/local/bin
STEP 8:
Check if its installed.
eksctl version
STEP 9:
Run the list command "ls". You should see the kubectl.
ls
STEP 10:
We stall helm package.
sudo yum install openssl -y
curl https://raw.githubusercontent.com/helm/helm/master/scripts/get-helm-3 > get_helm.sh
chmod 700 get_helm.sh
./get_helm.sh
STEP 11:
We ensure that your AWS credentials is configured. Run this command.
aws configure
STEP 12:
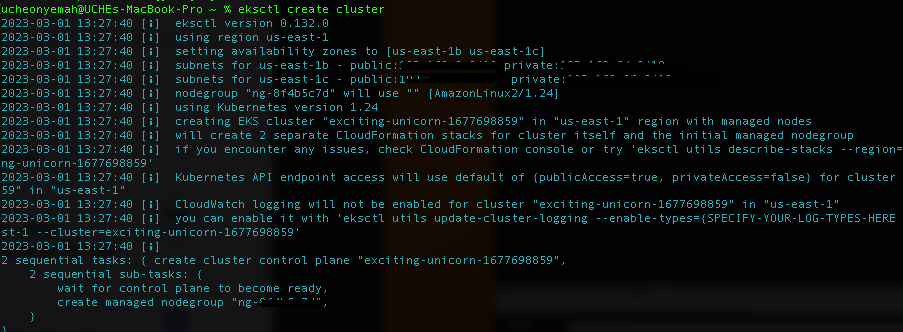
We create an EKS cluster. Wait for 20 minutes to provision.
eksctl create cluster
STEP 13:
Now, we set up EBS CSI add-on for EKS. The add-on allows clusters to manage its lifecycle EBS volumes of persistent volumes. "Replace the EKS cluster name"
oidc_id=$(aws eks describe-cluster --name my-cluster --query "cluster.identity.oidc.issuer" --output text | cut -d '/' -f 5)
aws iam list-open-id-connect-providers | grep $oidc_id | cut -d "/" -f4
eksctl utils associate-iam-oidc-provider --cluster my-cluster --approve
Now use eksctl to add this IAM ROLE for the cluster. Replace with "cluster name line 4"
eksctl create iamserviceaccount \
--name ebs-csi-controller-sa \
--namespace kube-system \
--cluster exciting-unicorn-1677698859 \
--attach-policy-arn arn:aws:iam::aws:policy/service-role/AmazonEBSCSIDriverPolicy \
--approve \
--role-only \
--role-name AmazonEKS_EBS_CSI_DriverRole
STEP 15:
Where you see "my-cluster" replace with your cluster name and replace "1112222" to your account ID.
eksctl create addon --name aws-ebs-csi-driver --cluster my-cluster --service-account-role-arn arn:aws:iam::111122223333:role/AmazonEKS_EBS_CSI_DriverRole --force
STEP 16:
Install the Wordpress using Helm.
helm repo add bitnami https://charts.bitnami.com/bitnami
We install chart is added to Wordpress. The Helm helps you organize your environment using the namespace.
helm install my-release --set wordpressUsername=admin --set wordpressPassword=defaultpass bitnami/wordpress
You've successfully downloaded Wordpress from Bitnami's repo. Let your username is "admin" and pasword "defaultpass"
export SERVICE_IP=$(kubectl get svc --namespace default my-release-wordpress --template "{{ range (index .status.loadBalancer.ingress 0) }}{{ . }}{{ end }}")
echo "WordPress URL: http://$SERVICE_IP/"
echo "WordPress Admin URL: http://$SERVICE_IP/admin"
STEP 19:
You should see two URLs. Log into your admin url with the user ID and password. The url is like the endpoint to connect you to the external IP and service is the ingress, direct the traffic. The site isn't secure to secure you will need a certificate manager.
STEP 20:
Now, your Wordpress cluster is using helm. We run the kubctl commands to check your nodes, clusters, namespaces, services.
kubectl cluster-info
kubectl get nodes
kubectl get pods -o wide
kubectl get svc
MONITORING WITH PROMETHEUS
Create a namespace for prometheus , add a chart community and deploy prometheus.
kubectl create namespace prometheus
helm repo add prometheus-community https://prometheus-community.github.io/helm-charts
helm upgrade -i prometheus prometheus-community/prometheus \
--namespace prometheus \
--set alertmanager.persistentVolume.storageClass="gp2",server.persistentVolume.storageClass="gp2"
STEP 22:
Check to see your pod inside Prometheus namespace.
Use kubectl to "port forward prometheus" console to your local machine through the server "9090".
Go to your local browser "localhost:9090. You should prometheus running.
Check your prometheus target and see the active metrics to view the running containers.
kubectl get pods -n prometheus
kubectl --namespace=prometheus port-forward deploy/prometheus-server 9090
kubectl port-forward -n prometheus svc/prometheus-server 9090:80
Congratulations you've successfully deployed Kubernetes integrate with AWS EKS and deploy with helm to organize your deployment using prometheus to monitor the pods. Happy Learning!!😊
Referencing: AWS: https://docs.aws.amazon.com/
Kubernetes : https://kubernetes.io/docs/home/
Helm :https://helm.sh/docs/
Prometheus : https://prometheus.io/docs/introduction/overview/
Kaity leGrande


No comments:
Post a Comment