Monday, May 29, 2023

DATA STORAGE, PERSISTENT STORAGE,


Dynamic Data: Are data that changes. for example; If you have a gmail account, you can change the profile around your account or you can change your recovery email and other information within that data. The reason why you're able to accomplish that is because its dynamic.

Static Data: Are data that cannot be changed. For example, A file within your bucket cannot be changed. 

Block Storage: Disk or drives are used to store data. Another name for it is called volume. Whenever you create a virtual machine in GCP it comes with a disk in which the data is stored inform of blocks. 

Persistent Disk: This is a durable network storage device that your instance can access. It can serve as a data store and application and to maximize latency for data storage. When it comes with the existence, its durable, and cannot get corrupt. You can only assign one persistent disk to a virtual machine.You can create a snap shot. By default Google cloud ensure that the data stored inside the block storage  is encrypted. for example, you provisioned 50GB after few months your workload increased you can resize the volume. Persistent disk volumes can be up to 64 TB in size. The maximum attached capacity for persistent disk is 257 TB per VM instance. 

a. Regional Persistent Disk: This span across availability zones. As long as that disk is available in that region your data will available for disaster recovery. 

Two types of persistent disk:

a. Hard disk disk blocked Persistent disk: This is streaming storage workload and throughout must be define by speed in which data can be transferred, translated in MB per seconds. The throughput provides the best latency to communicate from one region to another region in terms of data transfer.

b. Solid State drive: Google cloud provides you the ability to perform IOPS which means how quick a transaction can be processed to either read data or write data. 

IOPS  means Input and output operations per second. 

Standard Persistent disk : This is suitable for large data processing workload and its backed by hard disk drive. 

Extreme persistent disk: You can customize the IOPS and the cost will depend on what you provisioned. 

Balanced Persistent disk: This is backed by solid state drive and its cost effective. You can attach a balanced persistent disk to a maximum of 10 VM instance in a read only access.

Local disk: Its a physical disk that rely on host. Its not possible to attach local disk to a private VM in your private on-premises. However, you can migrate the data, use snapshot and its faster. But if you stop the VM, you will lose all the data because its ephemeral.

Auto-delete zonal persistent disk: You can automatically delete read/write persistent disks if its associated with VM instance.


Referencing : Google documentation. 


Friday, May 26, 2023

GCP -PRICING MODEL


PREEMPTABLE VMs: This is based on highest bidder. You will have 91% discount but can be terminated sooner due to system demand. Preemptable VM's always stop after 24hours, and its fully managed by GCP. This pricing is only recommended for fault-tolerant application. You have to be very careful because with this pricing model, you want to ensure that the workload can accept disruption at anytime. You cannot run critical workload. 
In order to avoid this  24hours termination, you an set up a Google Cloud Scheduler and integrating with Google Cloud Function intelligence and pub-sub for automation and alert, so it can create an on demand instance. 


Spot Instance: This is based on bidding. Spot instances go above 24hours before termination. Spot instances has all the advantages of preemptable VMs and no limitation of operation. 

Committed Used Discount: This is one of the advantage to provision your resources based on discount. When it comes to time frame you literally need a particular resource for a period of time, based on this, you can enjoy up to 70% discount for cost saving. 

There are two types of committed used discount:

a. Resources based CUDs:  This is the amount compute optimize workload  which you're getting into commitment for a particular period of time. You need to make sure you're consistent, and you pay a fine if you default the resources you signed-up for. Google cloud grant A year and 3 years within this discount. 

b. Spent based CUDs: This is the amount of money you're willing to spend per hour for a particular resources for a specific duration of time. For example, You can set up a figure( budget) and google cloud can provide you what is within that range of services and a discount will be granted by google cloud. And if you're not consistent within this region budget, you'll pay a fine. 

Sustained Used Discount: By default you can leverage on this pricing model. So, whenever you use applicable resource for more than fourth of a billing month you automatically receive discount for every incremental hour when you continually use the resource.   


Referencing: Google Documentation
Mbandi 


Thursday, May 25, 2023

GCE- MANUAL KEY CONFIGURATION - SSH KEY -PROJECT


Today, we will create VMs and provision SSH key manually within security. This is for learning purposes.

STEP 1:
Create a VM instances and  add a label ( key: env and value: dev)


STEP 2: 
Select a machine type. We are using fi-micro based on the workload and its cost effective based on the region. 


STEP3:
Select the boot disk. You need the O/S type. 


STEP 4:
This hands-on, we are using centos O/S.


STEP 4:
Click on advance and select security, we need to provision a manual key. 


STEP 5:
Open your terminal or Git bash. To manually generate SSH keys. You'll always share your public key within your workstation. You ensure that you're in the ~ directory in your terminal or git bash. We change the default name id_rsa to a customize name "gce-ssh".

To manually Generate SSH key

ssh-keygen -t rsa

## copy everything in the bracket
/Users/ucheonyemah/.ssh/id_rsa

### delete the id_rsa and provide key

##
/Users/ucheonyemah/.ssh/gce-ssh-key


## .ssh is a directory and ls is to list all directory in the folder
ls -al .ssh

##
You should see the private and public key
.pub indicate a public key

##
To view the key, we use the command “cat”

cat ~/.ssh/gce-ssh-key.pub


##
Copy the encrypted public key and paste within your console within security and create.


## copy your “VM IP external “
ssh 31.10.100.000

##
ssh 31.10.100.000


STEP 6:
You should get the encrypted key, copy the key and paste it within manually generated SSH keys within your console in step 4. 

STEP 7:
To see your private key, run this command.

cat ~/.ssh/gce-ssh-key


STEP 8:
Allow you to identify the private key file, you use the "-i" flag. You replace with the customize username, key and IP. If you're not sure of the user. Run the command "whoami". Get the external IP from your instance. SSH is the primary base command to login in any Linux O/S.


ssh -i .ssh/PRIVATE_KEY USER_NAME@EXTERNAL_IP


ssh -i .ssh/gce-ssh-key uche@31.10.100.000

STEP 9:
Paste the private key command and run it on your terminal. You should be able to get access within your private key. Run the command "whoiam". Your directory should be your instance that you're connecting into.


STEP 10:
You successfully and manually configured SSH KEY. 


Happy Learning!! 😊

Referencing: Google Cloud. 
  

Saturday, May 20, 2023

HYBRID CONNECTIVITY, VPN, ROUTING, BGP


 HYBRID CONNECTIVITY: This is the connectivity between Google Cloud Platform and on-premises data centre. There are several ways to provide this connectivity, depending on enterprise bandwidth and latency requirements. 

INTERCONNECT

1. Dedicated Interconnect.

2. Partner Interconnect.

Clients that make use of workspaces, when it comes to communication you make use of partner peering.

PEERING

3. Direct peering 

4. Career / Partner Peering 

5. VPN

VPN: Virtual Private Network. It allows you to be able to share data from one open internet to another. for example, You can set up your connection from on-premises data centre to cloud via the VPN tunnel and the data is encrypted. VPN communication when it comes to the bandwidth is between 3 - 30GBPS. However, If your environment have a massive data to migrate VPN will not be the best choice. 

TWO OPTIONS OF VPN

This depends on the client preferences, when it comes to the actual data transmission.

Classic VPN: Allows you to set up one tunnel per direction. This is a one way connection from from on-premises to cloud environment. Classic VPN gateways provides an SLA of 9.99% service availability. If the data application is low classic VPN will be best to leverage. 

High Availability VPN : Google cloud gives you the options to boost the two or more tunnel and channels from on-premises to GCP infrastructure. You can use automatic or static external IP addressAnd if one of the environment goes down, other tunnels will be active and functional. You can use ACTIVE ACTIVE tunnel or ACTIVE PASSIVE tunnel. This only support dynamic routing. 

VPN TERMINOLOGY

Tunnel: Is the based security you configure. The IPsec and SSL are both protocols used for securing data in transit  through encryption. SSL is a protocol for web browser that encrypts, decrypts and authenticate all the data.

                     VPN GATEWAY

When you are setting up a connection from on-premises to cloud, you will need two gateways. One set-up on-premises and cloud. The gateway on-premises will be encrypting the data while the cloud gateway will be decrypting the data and this is done automatically before translating based on the IPSEC set up. 

Interfaces: The entry and exit point of data between gateways. You can have a gateways that has dual IP's and its represented by an IP. When you create a VM, you need an IP to communicate. It is your responsibility to know what IPS address from on-premises is managed 

Packets/Payload: It means the data that is communicating between gateways. 

                        ROUTING

Google Cloud provides static and dynamic routes.

Dynamic routing: During configuration process, you must create a cloud router to make that connection from on-premises to cloud infrastructure. Google cloud provides an internal BGP IP range 169.254.0.0/16, that you literally need to connect with VPN configuration. When it comes with the BGP intelligence, it provision more route which automatically integrate the communication with an autonomous system number to generates a seamless workload. 

Border Gateway Protocol:Allows you to be able to discover your IPS address automatically . It is based on a particular IP that google cloud provides and this will comes in when you're establishing tunnels. The IPs that will be assign to the interface, this will be based on BGP and the BGP makes use of the assign IP. 

Autonomous System Number (ASN): Is a globally unique number for autonomous system on the internet.

Static routing : You manually configure the integration from on-premises to cloud environment. 

                                
                           INTERCONNECT

Google gives you the ability to connect with the mini data center with the closet point of presence(edge location), which google will establish that connection. The interconnect uses google to communicate with data and cloud infrastructure. it also uses google
backbone network and its bandwidth is about 200 GBPS per sec for the dedicated solution and this is more than enough for any workload and this is for one single connection. It makes use of premium network because data travels through only google cloud. This is more expensive than partner interconnect. 

PROCESS OF  DEDICATED INTERCONNECT

You will go to the console and within the hybrid connectivity, you define the connectivity. The LOA CFA will capture the company name, address all the information will be provided into his documentation via email when you make the request through the console and then, you establish that connection. 

dedicated interconnect identifies co-location which makes you to integrate with other provider. 

          PARTNER INTERCONNECT
Google cloud partner with AT &T , CISCO and so on. In order to integrate with google network at the level of their network you go through ISP connection. It is cheap.

                  PEERING
Direct peering has a direct link to google and career peering you make use of ISP ( broker) And both make use of public IP's in a very secured manner. This workflow ensure workspace is included within your environment.


Referencing: Google Documentation.


Friday, May 19, 2023

VPC PEERING DEMO


We are creating a peering connection between your default VPC and custom VPC. This two should be able to communicate privately without the need of external IP . VPC peering is completely free. 

STEP 1: 

Sign into your console

STEP 2:

Click on VPC network peering and create connection

STEP 3:

This is requesting for the connection to be establish, you'll not see the request visible, its running at the back ground. We do not have custom route to export so, in this demo its disabled. 

You are making a VPC peering connection from Default (auto) to custom 


STEP 4:

You are making a VPC peering connection from Default (auto) to custom. A target point has been established. We do not have custom route to export so, in this demo its disabled. 

And if you get an error its possible you're experiencing an IP overlap.

STEP 5:

In this demo you've established a VPC peering connection. 


Great! You've successfully deploy a VPC peering connection. 


Referencing: Google Documentation. 


Thursday, May 18, 2023

GCS -LIFE-CYCLE MANAGEMENT, CONDITIONS.


 Lifecycle management : In order to use Object Lifecycle management, you define a lifecycle configuration which is specified on a bucket. At the level of GCS allow you to create particular rules to transition data from one storage class to another based on specific conditions. And the conditions could be, for example, an object can be stored in cloud storage for four months and after four months the developers likely not won't be accessing the data frequently. At this point the conditions you set up will be based on timeline. 

You can also move data from standard to nearline or coldline. If the objects is not assessable within the specified lifecycle, it can be moved to archive and you can also delete the object anytime. 

Lifecycle management has help to automate move of objects to a different storage class based on their age. It has delete old version of objects and reduce storage costs. 

CLOUD STORAGE OBJECTS BY SETTING CONDITIONS.

Timeline

Age: Many companies use this condition. Age condition defines the time when the object was created in a bucket and it can be moved from one location to another 80days, 90days, 360days. This works with any class and the actual files. 

Createdbefore : In this case,  you can create a rule in GCS that every previous object that was created before MAY 19TH to transition the object from one storage class to another. 

Multiple rules and Conditions: Another conditions you can set up would be, if the storage class matches any standard, nearline, archive, which the data can be transitioned.  

Versioning: When it comes to the bucket, first you have to delete the object before the bucket. If you're wondering where the object resides after deletion, this is were versioning comes in. You have to explicitly enable the management capability of the bucket because, it will keep multiple version of all the object in the bucket and anytime you try to delete, it will take a back-up and store it in the versioning pool. Versioning will act as your recycle bin.

Pub-sub: It is fully managed real-time messaging system to send auto-alert between independent applications. You can set up a topic that act as a pub-sub resources and then integrate GCS at the level of the topic and then create a subscription within the specific topic then subscribe email. This will give you visibility of the bucket. 


Referencing: Google Documentation. 


Wednesday, May 17, 2023

SET-UP SHARED VPC


Today's hands-on, we will be deploying two applications for an e-commerce environment. The goal is sharing the VPC networking within the projects. Six subnets will be created which is attached within shared network and you configure the firewall rules.

With shared VPC you're able to delegate administrative responsibilities by managing instances, to  services project Admins while maintaining centralized control of subnets, routes, firewalls. 

STEP 1:

Sign in as an admin.

STEP 2

Click on IAM & Admin

STEP 3:

Click on the project "My First Project". This will be host project and your shared VPC will be inside of the host project. 


STEP 4:


STEP 5: 


STEP 6: 

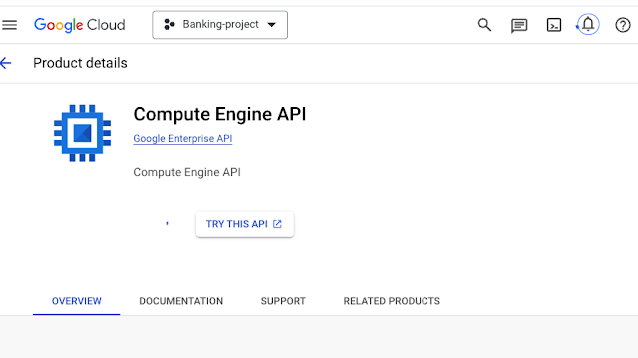
Enable the API within your compute Engine. 


STEP 7:

Navigate to cloud VPC and create


STEP 8:

 Select a region, CIDR block


STEP 9:


STEP 10:

Create second subnet.


STEP 11:

Create third subnet.


STEP 12:

create the fourth subnet.


STEP 13:

Create the fifth and sixth subnet and select your firewall rules.


STEP 14:

Configure firewall and create.


STEP 15:

Click on shared VPC  and set up to integrate with project. 


STEP 16:

Select the six subnet you provisioned initially and create. 


STEP 17:

To give permission, only select your banking project and investment project and save. Once it saved, it will go ahead and run the assigned projects. Select your banking project and enable API.


STEP 18:

You go back to your first project and attached the projects. Click on attached projects and select.


STEP 19: 

Select the six created subnets.


We have successfully created a shared VPC. 😊 !! Next Slide, we will set-up a VM machine. 

Referencing: console.cloud.google

GOOGLE CLOUD STORAGE CLASSES, NEARLINE,COLDLINE.


STORAGE OPTIONS  IN GOOGLE CLOUD 

AUTO CLASS STORAGE:  You can ONLY use this at the time of creation. This moves your data from one storage to another. If your data has a variety of access pattern . For example, if a customer says they have 5 TB of data and they want to optimize cost further or the client has no idea how often they will access their data. Auto class will be the best option. There's NO RETRIEVAL COST, AUTOMATION, STORAGE. You only pay monthly management fee $0.0025 for every 1000 objects assign to the project. 

STANDARD STORAGE CLASS: This is a frequent accessed data with high performance, low- latency. It is suitable for website content, interactive applications and analytics data. It is more expensive. A used case can be development data, the developer will utilize this on a daily base to analysis logs. 

NEAR LINE STORAGE CLASS: This storage is less frequently( like once a month) assessed and when you need to retrieve data or access it incur additional cost. A used case can be backup or reporting. With minimum storage duration of 30 days. 

COLD LINE STORAGE CLASS: Is a storage class that is infrequently accessed and its slightly higher when retrieving and storing data. The access pattern is every 90 days/ quarterly. 

ARCHIVE STORAGE CLASS: This data are stored for a long period of time and it incur additional cost retrieving and early deletion of data. The minimum storage duration is 365 days. A used case will be long-term backup, compliance or regulatory purposes. 

THE DIFFERENCE BETWEEN STORAGE COST AND RETRIEVAL COST.

STORAGE COST: This is the amount of money you pay based on your data size.

RETRIEVAL COST: The amount you pay to retrieve data from GCS bucket meaning it will download the object and this only apply to Nearline, Coldline, Archive. 


Referencing: Google Cloud documentation.

Monday, May 15, 2023

SET UP SDK


                               Install the Google CLI 


 Install the latest gcloud CLI version for macOS users. Ensure you already install python

STEP 1:

Check the current version of your python3 -V

STEP 2: 

macOS 64-bit

(ARM64, Apple M1 silicon)

Run the package https://dl.google.com/dl/cloudsdk/channels/rapid/downloads/google-cloud-cli-449.0.0-darwin-arm.tar.gz 

macOS 64-bit

(x86_64)


STEP 3:

For practice, run this as root folder.

sudo su

./google-cloud-sdk/install.sh


STEP 4:

cd /var/root/.bash_profile

STEP 5:


STEP 6:

Provide the preference as flags. 


./google-cloud-sdk/install.sh --help


STEP 7:

Run and install the script with screen reader permission. 

./google-cloud-sdk/install.sh --screen-reader=true


STEP 8:

There should be an automated integration from your terminal to google console, requesting for google cloud email sign in and project Id. If configuration is confirmed implement the numeric 1, choose the region and zonal. 

cd /var/root/.bash_profile
./google-cloud-sdk/bin/gcloud init


STEP 9:

The connection network should passed.


STEP 10:

Run gcloud version. You should have google cloud SDK installed.  


You have successfully installed gcloud CLI version. Happy Learning 😊!!


Referencing : Google documentation


CONFIGURING A PHISHING CAMPAIGN IN MICROSOFT DEFENDER.

Configuring a phishing campaign in Microsoft Defender (specifically Microsoft Defender for Office 365) involves creating a simulated attack ...