Sunday, June 4, 2023

PROJECT- ORGANIZATION HIERARCHY


This is for learning purposes. In this project, you will create the different folders, projects and some resources such as VM instances and buckets and upload some pictures in each bucket created for the Q-TechWorld. 

https://cloud.google.com/resource-manager/docs/cloud-platform-resource-hierarchy


STEP 1: 

Login to your domain account and select your organization owner project under IAM and permission, edit permission for the organization owner and grant cloud Asset owner, organization Administrator, security centre Admin roles by editing it. 


STEP 2:

Click on manage resources under IAM and click on create folder to create folders and projects per requirements. 


STEP 3:

Create a Financial App and Insurance App Folders

Create Banking, Investment,Individual insurance and corporate insurance subfolders. 


You create the subfolders and browse your location within the folders. 


STEP 4:

Select the newly created Banking project and Investment project from the project tab and then create resources such as VM instance, Banking project VM by searching for compute engine. 


You should this structure within your manage resources.


STEP 5:

Creating a VM instance Banking-VM in us-central 1b- zone with the basic information and centos 7 image. 


You can SSH into your browser and grant access. 


STEP 6:

Create the second resource for the banking project by searching for cloud storage.

 Create banking project-gcs basic bucket and upload a picture. 


STEP 7:

Select the newly created Investment project from the project tab and then create resources such as VM instance( investment project vm) by searching for compute engine. 


Create a VM instance Investment-vm in us-central 1a- zone with the basic information and Debian- 11 image. 


Create the second resource for the investment project by searching for cloud storage.
  Create investment project-gcs basic bucket and upload a picture. 


STEP 8:

Select the newly created Corporate project from the project from the project tab and then create resources such as VM instance  (Corporate- project-VM) by searching for compute engine. 


Create a VM instance corporate- VM in us-central 1-F zone with the basic information and Ubuntu-18.04 image. 


Create the second resource for the corporate project by searching for cloud storage.
  Create corporate-project-gcs basic buckets and upload a picture. 


STEP 9:

Select the newly created individual ins project from the project tab and then create resource such as VM instance (individual-project-vm)by searching for compute engine. 


Create a VM instance individual-ins-vm in us-central 1c zone with the basic information and fedora cloud image. 


Create the second resource for the corporate project by searching for cloud storage.

  Create individual-project-gcs basic bucket and upload a picture.


You've been able to run through organizational hierarchy project. Happy Learning 😊!!!


Referencing : Google Documentation


Friday, June 2, 2023

HANDS-ON PERSISTENT DISK, LOCAL DISK, BOOT DISK & CONFIGURATION FILES SET-UP


Today, you will attach a persistent disk to an existing VM or attaching  a new disk without stoping the VM. 

STEP 1: 

Create a folder in your local "Google-Cloud-Platform"

STEP 2:

Within step 1 folder, create a folder "Compute"

STEP 3:

Within step 2 folder, Create two folders "Compute-Engine and APP-Engine".


STEP 4:

Create a file "jjtechflix-app-deploy.sh"within compute-engine. Any script that has .sh is a shell script and can only run in a linux machine. 

STEP 5:

Paste script within the file and technically you should have 11 lines of codes and save. 

#! /bin/bash
sudo apt update -y
sudo apt -y install apache2
sudo systemctl start apache2
sudo systemctl enable apache2
sudo apt install wget -y
sudo wget https://github.com/awanmbandi/google-cloud-projects/raw/jjtech-flix-app/jjtech-streaming-application-v1.zip
sudo apt install unzip -y
sudo unzip jjtech-streaming-application-v1.zip
sudo rm -f /var/www/html/index.html
sudo cp -rf jjtech-streaming-application-v1/* /var/www/html/

STEP 6:

Create a VM, allow HTTP traffic, expand advance option and expand management, you'll see automation start script and ensure that you pass the data at the level and create. 


#! /bin/bash - Allow you to run operations inside linux. 


STEP 7:

Copy your external IP address and run on your browser, click on the disk. You should see the application you deployed. This is not a secured site. 


STEP 8:

You're creating a second disk to attach to an existing VM. Click on disk and it tells you exactly what VM is associated with the disk. You create a disk. The second disk will not be refer to as a boot disk because it has no image, OS. 


STEP 9:

Go back to VM , click the name you created and click on edit. Your interest is within edit. You can start changing things within the panels, its either you're changing or adding. 


STEP 10:

Search for storage, you'll see the boot disk which you configured. Select "keep disk". This means that, even though you delete the VM, the disk will not be deleted. Click on add new disk and save. 


STEP 11: 
You created an additional disk that has no image. You will create a custom image from this disk and attached an instance. 


STEP 12:
You're preparing for disaster recovery strategies on the application. The application is running within the boot disk that is powering the VM. We need to focus on the actual boot disk. In order to achieve this, you create a custom image from the existing VM and you'll still able to recovery and access it.  

Click on the instance name and create machine image.

 You select the option "regional" to save cost. The multi will incur cost. And create. 

By default when you create a custom image it will automatically capture the additional disk that you initially create including the boot disk. Within the created custom image you can create an instance


STEP 13:
Create instance from the machine image.

change the name of your "vm" and save. 


STEP 14:
Snap shot : You will take back up of your persistent disk. 

Go to disk and  click your VM you created and create snapshot and create. 


You can also filter based on labels. 
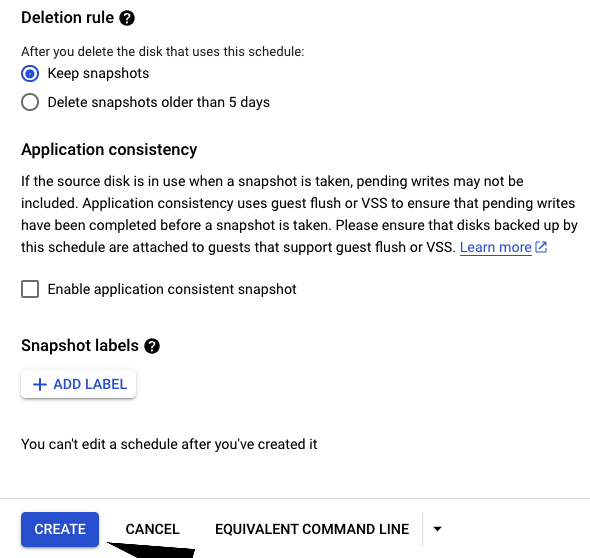
STEP 15:
You're trying to automate snapshot for an application back up. To achieve this, you click on snapshot panel and "create snap shot schedule". Your persistent disk( VM) should be in the same region where  the snapshot is taken.  


You take snap shot when the application traffic is at its lowest. You have to identify your peak period of request from users. for example, 1am -2am.  Once this snap shot is created, by default all the snap shot  in that particular region will be taken.


STEP 15:
You've successfully deployed a persistent disk, attached an additional disk and provisioned an image which you then created a custom image. We configured with a snapshot for back-up. 

Happy Learning!!😊

Referencing: Mbandi AAK 

https://github.com/awanmbandi

                    Google documentation. 


PERSISTENT DISK- SNAP SHOT


                                       Persistent Snap Shot

Are taken in an incremental fashion. What happens is that, by default is making use of GCS in the background that takes a full back-up. If the data changes when taking the second snapshot, it will actually capture the incremental change. For example: If a snap shot was taken at 1pm - 2pm, it will only capture the data after 2pm for the next hour. The longer the back-up the higher the risk. You have to be strategic when designing your architecture to optimize cost.

The back-up will be stored in form of object. Technically, snap shot is global in nature. For example, you have a snapshot in us-east1, you can call out the snapshot in us-west-2. You can share snapshot across different projects in your organization with the use of one single operation. 

TWO MODES OF SNAP SHOT

Every snapshot is encrypted by default. And the data is protected

1. Manual : You can make use of gcloud(CLI). One of the challenges with manual snap is error, more engineer, time consuming, cost, inconsistent.

2. Automated Approach: Snapshot scheduler will help your automate snapshot. Snapshot scheduler will require you to set up a policy, one of the policy will be, how often do you want to take the snapshot, everyday, weekly, monthly. You can specify the start time and end time. You need to define the snapshot retention period( 10, 20, 50 copies). 


Referencing : Google Cloud


DOCKER ENGINE ,DOCKER DAEMON


DOCKER ENGINE

We will take a look at docker architecture. And how it runs application in isolated container. Each time you install docker on a Linux machine, you're installing three different component Docker CLI, REST API, Docker Daemon. Docker Engine is an open source containerization technology for building and containerizing applications.

DOCKER DEAMON: 

Is the background processes that manages docker object like images, network, volumes, container.

REST API: 

This is the interface program that interact with docker daemon through CLI. You can create your tools using this API.

DOCKER CLI:

This is the command line interface. It uses the REST API to interact with the docker daemon.


DOCKER ARCHITECTURE

Docker uses a client-server architecture. There's an interaction between docker client and docker daemon which helps with building, running and distribution of your docker containers, For the communication to be seamless there's a REST API, over UNIX sockets or network interface that brings all together. 


DOCKER REGISTRY

If you have an idea how github repository works, then docker register in this case, stores Docker images. Docker hub is a public registry that anyone can use and you can configure and look for images on docker hub by default. You can as well own a private registry. With the command  docker pull, docker run helps you to fetch the images from the registry. The command docker push helps you to push what you configured to your registry. 

HOW DOES APPLICATION WORKS UNDER THE HOST: 

Docker uses namespace to provide the isolated workspace called the container, like process ID, network, interprocess communication, mount. When you run a container, docker creates a set of namespaces for that container. 


Process ID: You start a Linux O/S, it starts with one process ID which is the root process which kicks off other processes ID in the system . 
The command "docker ps" to list all the running processes. The process ID are unique and you cannot have the same process ID. 

Container: You create a container you have a another process ID created at the base linux system, on the host from an existing process ID, in this case process ID namespace is created in which the process ID within container is functioning independently.You can list the service on a docker container, and you'll see process ID of the container. That means all service are running on the same host but separated into containers using namespaces. 

Cgroups: Control group is a linux kernel feature that limits and isolates resource usage (CPU, memory, disk, network). By default there's no restriction as to how many resources can be use in a container however, a container may use all the resources within the host. In order to restrict the amount of CPU or memory, docker uses  Cgroup to control the amount of resources in a container. You can run the command "docker run --memory=200m ubuntu". You limit the amount of memory.


Referencing: docker documentation 
                     https://docs.docker.com/engine/
                    Kodekloud


Thursday, June 1, 2023

GCS BUCKETS, PLACEMENT, DISASTER RECOVERY


You can create different bucket which are containers that you use to house different files or objects in GCS. Buckets are similar to folders in a file system which can hold objects, like images, videos files etc. For example, in a financial environment, you'll have various buckets for savings, store ID's, payment. this will help you manage and segregate access within the buckets. You can set-up buckets in production and keeping it isolated from developers for best practice. 

Bucket names are unique. Google cloud storage name space is global. For example, apple-tech which already existed cannot be used. 

             BUCKET PLACEMENTS 

REGIONAL BUCKET:  Google cloud ensures that your buckets are spread across three AZ's. You can create a bucket that is placed in New York, North Virginia, MaryLand ( region). Storing data in a region closer to your users or applications can improve access performance and latency, government regulations and compliance, cost, durability. 

 DISASTER RECOVERY:

Disaster recovery could be from two angles in GCS. A disaster could come from customer side or google side. For example, from a customer side may be, someone goes and delete the bucket completely, probably because they had no knowledge what the bucket is used for and they felt its accumulating cost. In which they had data within the bucket that are critical. This will be disaster from the customer side. 

Disaster from google will be an inactive AZ . 

To advert this disaster from happening depends from the customer service agreement. A structure can be set-up to replicate data from one bucket to another. Google cloud provides a MULTI-REGION buckets. What google cloud does is that, it spread your bucket across at least three different regions, this means that when you store an object in New York, automatically google cloud will replicate it to MaryLand (REGION B)and North Virginia( REGION C). For example, If region C ( North Virginia) affected by fire, your object will be assessable. 

In the case where someone delete the actual bucket your DATA WILL BE LOST. Its one bucket that SPANS ACROSS MULTIPLE  REGIONS. Google cloud does not create the bucket. you might want to start looking for an option that you can make use of CREATING BUCKETS IN ANOTHER REGION. 

DUAL REGION BUCKETS

Your buckets is spread across two regions and everyday your data is stored in two region within a bucket. 

DATA TRANSFER SERVICE

You can use service to sync source. Data transfer service is a software  service that enables users to move extensive amounts of data from their data center to a cloud storage bucket. This is a separate copy of this same data in another region. This helps you to automate and schedule data transfers between different cloud storage. 

TURBO REPLICATION 

It only work with dual region .  Turbo replication provides faster redundancy across regions for data in your dual-region buckets. It  reduces the risk of data loss exposure. This does not work with multi and single region. 

How it work?

When it comes to turbo replication you do not establish a source bucket. You enable turbo replication to speed up replication data between GCS location. 


Referencing: https://cloud.google.com/docs

Questia: https://www.blogger.com/blog/post/edit/5428112557550405099/659111939410319071


GRC

  How confident are you in your security program (Tools, systems, controls etc)? In the context of information security , the terms valida...