Saturday, March 11, 2023

TERRAFORM MODULE


                        WHAT ARE MODULES

Module provide a way to organize terraform code into reusable components, making it easier to manage and maintain complex infrastructure deployment.

For example

       HOW TO USE TERRAFORM MODULE

To use a terraform module, you declare it in your terraform configuration file and provide necessary input as variables. This is how module uses it to provision infrastructure resources according to its defined configuration. 
 
WHAT DOES TERRAFORM MODULE DO?

You can leverage on terraform modules to create logical abstraction 


You define the module by making use of the "RESOURCE BLOCK" and you consume the module by making use of the "MODULE BLOCK"

For example:
Root --------------Module Block
Child-------------Resource Block

ROOT MODULE
When you run terraform commands directly from a directory ".tf" it is considered to be the root module. The root module call the child module. 

CHILD MODULE:
It is when a configuration has been called multiple times by another module.            


OUTPUT VALUES:
Output values in terraform allows you to export particular values from a module/ multiple modules to another.

USED CASE:
Deployment in terraform, there are attributes which we want to identify its value. To get your public instead of going to the console each time a resource is created. We can make use of output values to display the public IP, public DNS at the level of you CLI you pass this command.  

 TWO MAIN USED CASE OF OUTPUT VALUES 
  • Printing Values on CLI
  • Resolve resource dependencies ** very important**
       
           MODULE SOURCE

Module source is the direct path where the actual child module config file set in. 


module "module_name" {
source = "module_source_location" ( This will be the path)

variable_name = "variable_value"
}


 META ARGUMENTS ARE:

  • Counts
  • depends_on
  • Providers
  • for_each

Let's develop modules (root)  and Child modules. Keep in mind that In an environment no one writes codes over and over. 

STEP 1:
Create a folder "developer-env"

STEP 2:
Within the above folder create 2 folder and give it any name "Uche" "Hodalo"We assume Uche and Hodalo are developers in our exercise. 

STEP 3:
Create a file "modules" within the developer-env folder.

STEP 4:
Within the module file create a folder "custom".

STEP 5:
Within the custom folder create 4 folders "EC2" "NETWORK" "RDS" "SG".
 
STEP 6:
Within the EC2 folder create two files "variable.tf" "webapp-ec2.tf".

variable.tf
# Dev instance ami_id
variable "dev-instance-ami-id" {
type = string
default = "ami-0b******2a63"
}
# dev instance type
variable "dev-instance-type" {
type = string
default = "t2.micro"
}

variable "ami" {
type = string
}

variable "key_name" {
type = string
}

variable "instance_type" {
type = string
}

variable "name" {
type = string
}

variable "subnet_id" {
type = string
}

variable "vpc_security_group_ids" {
type = string
}

STEP 7:
"webapp.tf"

resource "aws_instance" "prod-vm" {
# (resource arguments)
ami = var.ami
key_name = var.key_name
instance_type = var.instance_type
user_data = file ("webapp-deploy.sh")
subnet_id = var.subnet_id
vpc_security_group_ids = [var.vpc_security_group_ids]
associate_public_ip_address = true # assign public Ip to the EC2 at the time of creating EC2
tags = {
Name = var.name
}
}

STEP 8:
Within the network folder, create three files "outputs.tf" "variables.tf""webapp-network.tf"

"output.tf"
# exporting subnet1 id
output "subnet_1_id_export_output" {
value = aws_subnet.Dev-subnet-1.id
}

# exporting subnet2 id
output "subnet_2_id_export_output" {
value = aws_subnet.Dev-subnet-2.id
}

# exporting vpc id
output "vpc_id_export_output" {
value = aws_vpc.Dev-vpc.id
}

STEP 9:
"variable.tf"
# Dev instance ami_id
variable "dev-instance-ami-id" {
description = "Development ami id"
type = string
default = "ami-0b0d********a63"
}
# dev instance type
variable "dev-instance-type" {
description = "Development instance type"
type = string
default = "t2.micro"
}
# dev vpc cidrblock
variable "cidr_block" {
description = "Development vpc cidr_block"
type = string
}

variable "sn1_cidr_block" {
description = "Development subnet 1 cidrblock"
type = string
}
variable "sn1_availability_zone" {
description = "Development subnet 1 avialability_zone"
type = string
}
variable "sn2_cidr_block" {
description = "Development subnet 1 cidr_block"
type = string
}
variable "sn2_availability_zone" {
description = "Development subnet 2 avialability_zone"
type = string
}
variable "vpc_id" {
type = string
description = "vpc_id"
}

variable "instance_tenancy" {
description = "Development vpc instance_tenancy"
type = string
}

STEP 10:
"webapp-network.tf". At the vpc_id is been referenced because we need to make use of the variable, we will tell terraform to make use of this particular subnet. We want flexibility so that if we have multiple VPC'S and we want to create subnet in other VPC, variablelizing it will not be a constraint. 
# Create Development VPC
resource "aws_vpc" "Dev-vpc" {
cidr_block = var.cidr_block
instance_tenancy = var.instance_tenancy
tags = {
Name = "Dev-vpc"
}
}
# Create Development subnet 1
resource "aws_subnet" "Dev-subnet-1" {
vpc_id = var.vpc_id # to cross reference a resource in terraform use: resource_type.LocalResourceName.id
cidr_block = var.sn1_cidr_block
availability_zone = var.sn1_availability_zone
tags = {
Name = "Dev-subnet-1"
}
}
# Create Development subnet 2
resource "aws_subnet" "Dev-subnet-2" {
vpc_id = var.vpc_id
cidr_block = var.sn2_cidr_block
availability_zone = var.sn2_availability_zone
tags = {
Name = "Dev-subnet-2"
}
}
# to create Dev-vpc internet gateway
resource "aws_internet_gateway" "Dev-vpc-igw" {
vpc_id = var.vpc_id #to cross reference the vpc resource id
tags = {
Name = "Dev-vpc-igw"
}
}
# to create Subnet 1 Public RT
resource "aws_route_table" "Dev-SN1-RT" {
vpc_id = var.vpc_id

route {
cidr_block = "0.0.0.0/0"
gateway_id = aws_internet_gateway.Dev-vpc-igw.id
}

tags = {
Name = "Dev-SN1-RT"
}
}

# to create Subnet 2 Private RT
resource "aws_route_table" "Dev-SN2-RT" {
vpc_id = var.vpc_id
tags = {
Name = "Dev-SN2-RT"
}
}

#Public RT Association
resource "aws_route_table_association" "Dev-SN1-RT-Association" {
subnet_id = aws_subnet.Dev-subnet-1.id
route_table_id = aws_route_table.Dev-SN1-RT.id
}

#Private RT Association
resource "aws_route_table_association" "Dev-SN2-RT-Association" {
subnet_id = aws_subnet.Dev-subnet-2.id
route_table_id = aws_route_table.Dev-SN2-RT.id
}

STEP 11:
Within the "Security-group" folder create three files.

outputs.tf
# exporting security group id
output "security_group_id_export_output" {
value = aws_security_group.Development-SG.id
}

STEP 12 :
"variable.tf"
variable "vpc_id" {
type = string
description = "vpc_id"
}

STEP 13:
"webapp-sg.tf". You noticed there's no variable in this file. 

resource "aws_security_group" "Development-SG" {
name = "Development-SG"
description = "Development-SG"
vpc_id = var.vpc_id
ingress {
description = "TLS from VPC"
from_port = 80
to_port = 80
protocol = "tcp"
cidr_blocks = ["0.0.0.0/0"]
ipv6_cidr_blocks = ["::/0"] #default description for IPV6
}
egress {
from_port = 0
to_port = 0
protocol = "-1"
cidr_blocks = ["0.0.0.0/0"]
ipv6_cidr_blocks = ["::/0"]
}
tags = {
Name = "allow_http traffic"
}
}

STEP 14:
Run the terraform command
-apply


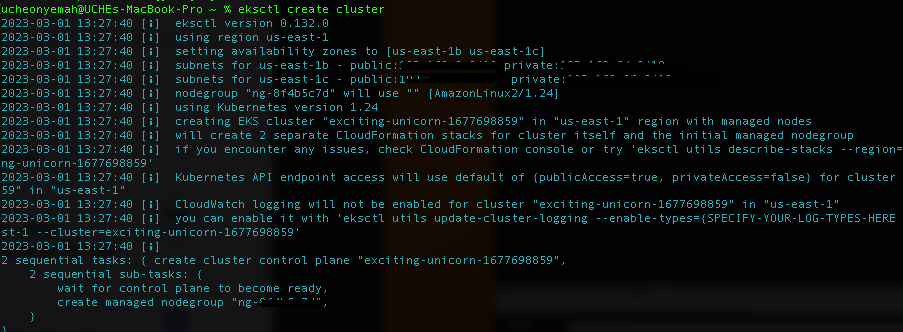
You have successfully deployed a custom module. ๐Ÿ˜Š Lets try a few projects by clicking the link below. 


Wednesday, March 8, 2023

TERRAFORM IMPORT


                 TERRAFORM IMPORT

Terraform import will import the actual existing infrastructure file to your local state file or remote state file. Terraform import will not create a configuration file for you. We had to sync the environment.

In our previous slide we discussed drift and saw how terraform import resolved drift. And today we will deploy a simple webpage application.
https://www.blogger.com/blog/post/edit/5428112557550405099/3933215085450776166


STEP 1:
We will create a resources manually. Create EC2 instance ( dev-vm) in your console. We will use "Ubuntu 18.04". Give a key pair

STEP 2
 Select "HTTP"traffic.

STEP 3:
 Pass "user data"

#! /bin/bash
sudo apt update -y
sudo apt -y install apache2
sudo systemctl start apache2
sudo systemctl enable apache2
sudo apt install wget -y
sudo wget https://github.com/UCHE2022/Uche-streaming-application/raw/jjtech-flix-app/jjtech-streaming-application-v1.zip
sudo apt install unzip -y
sudo unzip jjtech-streaming-application-v1.zip
sudo rm -f /var/www/html/index.html
sudo cp -rf jjtech-streaming-application-v1/* /var/www/html/


STEP 4:
Lunch your instance.

STEP 5:
Create a "terraform import folder".

STEP 6:
Create a "provider.tf" file within the folder.

terraform {
required_version = "1.3.4"
required_providers {
aws = {
source = "hashicorp/aws"
version = "4.39.0"
}
}
}

provider "aws" {
region = "us-east-1"
profile = "default"
}

STEP 7:
 Run the "init" command.

STEP 8:
"cd" into the path folder and copy your instance id and paste it below. 

To import you have to specify the resources name and instance id, whatsoever resource you want to indicate (Rds,Subnet,Nat gateway). This is set back doing things manually. 

STEP 9:
In the terraform import directory run the below resource argument, dot the local name of the resource (aws) and the specific ID.

terraform import aws_instance.dev-vm i-01****42c*****34e50


STEP 10:
Copy the resource argument and create the file "ec2.tf" within the terraform import folder. Note that, the file name can be anything, i.e, main.tf. 

The reason why we created this file is because terraform will only capture the import at the level of the state file. The goal is resolving the "drift" we captured the argument in the tf file and passed it within the configuration file. 

resource "aws_instance" "dev-vm" {
# (resource arguments)
}

STEP 11:
Rerun terraform import command 


STEP 12:
A "tf state file" has been created locally. We did not run "apply validate", and because we're importing an infrastructure, it has to create a "tf file" with the exact description of that particular resource. 
  

STEP 13: 

We need to define the instance type, key pair and ami. 
Create a file "variable.tf". We need to variablelize the ami, instance type and key pair.

variable "ami" {
type = string
description = "dev ami"

variable "key_name" {
type = string
description = "dev instance key_name "
}
variable "instance_type" {
type = string
description = "dev instance_type"
}
}

STEP 14:
Update your ec2.tf file with the ami, keypair and instance

resource "aws_instance" "dev-vm" {
# (resource arguments)
ami = var.ami
key_name = var.key_name
instance_type = var.instance_type
}

STEP 15:
Now, we define the value from our "state file" because we already imported the ec2 instance from the console to state file. 

Create a file "dev.auto.tfvars". Go to the state file and copy your actual value and pass it in the configuration file. 

ami = "ami-026***eb4****90e"
key_name = "cicd"
instance_type = "t2.micro"


Run terraform init and you see that the user data has not been specified. In your ec2.tf file update the user data file. 

STEP 16:
Create a file "webapp.sh".

STEP 17:
Copy and paste the IP of your instance on the "web browser". And click on "dist" to see the webapp application. 


STEP 18:
Run terraform apply you should see 
- Nothing to change 

You have successfully deployed terraform import to avoid drift in your configuration. You can see the work flow via the GitHub link below.  Happy Learning ๐Ÿ˜Š


Referencing : 


Sunday, March 5, 2023

DRIFT IN TERRAFORM


A Drift is said to have occurred when changes are made via the console, to the resources that previously set up via Terraform configuration files. 

For example:
Most organizations have policies that mandatory enforce the creation of resources through terraform only. However, sometimes when a software engineer encountered an issue, and as a result, created an ec2 instances via the console. As a result, A DRIFT is experienced given that the newly created instance was not part of the terraform configuration file. 

HOW DO WE RESOLVE A DRIFT?

One of the arguments that can be used to ratify the change made by the software engineer (as mentioned above) is "Terraform import".  

On the part of the software engineer, the reason could be that the resources that were created via the console were critical which involve some live systems in which other integrations and users are making use of. In this situation, the engineer cannot delete and re-provision through the terraform configuration file. Should there be any deletion and re-provisioning, this could result to DOWNTIME. And to solve downtime, we leverage  terraform import command. 

To note: Apart from Terraform Import, another solution being worked on by Hashicorp to to solve Drift, is to allow you import the resources created in the console with actual configuration files.

For example:

By running "terraform import" The resources (causing the drift) is imported to the local environment where you're working on. This means that you do not have to write the configuration file, terraform automatically develop it. 

Lets get few hands-on done on Drift: 

Commands you should know. 
## shows the state file in a human friendly manner
terraform show

## gives me a high level overview of what what was captured at the state file.
## It helps to show any missing resources that has been created.
Terraform state list

Terraform refresh


THE FOUR RESOURCES BEHAVIOUR IN TERRAFORM:

  • Initial creation
  • Update in place
  • Destroy and recreate
  • Destroy 

STEP 1:
Establish a folder call "terraform"

STEP 2:
Within the folder, create a file "provider.tf"

terraform {
required_version = "1.3.4"
required_providers {
aws = {
source = "hashicorp/aws"
version = "4.39.0"
}
}
}

provider "aws" {
region = "us-east-1"
profile = "default"
}


STEP 3:
Create a file call "dev.tfvars"

Dev-vpc-cidr_block = "10.0.0.0/16"
Dev-vpc-instance-tenancy = "default"
Dev-subnet-1-cidr = "10.0.1.0/24"
Dev-subnet-1-availability-zone = "us-east-1a"

 STEP 4:
Create a file "sg-group.tf"

resource "aws_security_group" "development-SG" {
name = "development-SG"
description = "development security Group"
vpc_id = aws_vpc.Dev-VPC.id

ingress {
description = "TLS from VPC"
from_port = 80
to_port = 80
protocol = "tcp"
cidr_blocks = ["0.0.0.0/0"]
ipv6_cidr_blocks = ["::/0"]
}

egress {
from_port = 0
to_port = 0
protocol = "-1"
cidr_blocks = ["0.0.0.0/0"]
ipv6_cidr_blocks = ["::/0"]
}

tags = {
Name = "allow http traffic"
}
}

STEP 5:
Create a file "variable.tf".

# dev vpc cidr block
variable "Dev-vpc-cidr_block" {
type = string
}

# dev vpc instance tenancy
variable "Dev-vpc-instance-tenancy" {
type = string
}

# dev vpc subnet1 cidr block
variable "Dev-subnet-1-cidr" {
type = string
}

# dev vpc subnet1 availability zone
variable "Dev-subnet-1-availability-zone" {
type = string
}

STEP 6:
Establish s file "Vpc-network.tf".

# Development VPC
resource "aws_vpc" "Dev-VPC" {
cidr_block = var.Dev-vpc-cidr_block
instance_tenancy = var.Dev-vpc-instance-tenancy

tags = {
Name = "Dev-VPC"
}
}
# Development Subnet 1
resource "aws_subnet" "Dev-Subnet-1" {
vpc_id = aws_vpc.Dev-VPC.id
cidr_block = var.Dev-subnet-1-cidr
availability_zone = var.Dev-subnet-1-availability-zone
tags = {
Name = "Dev-Subnet-1"
}

# Development VPC internet Gateway
resource "aws_internet_gateway" "Dev-VPC-IGW" {
vpc_id = aws_vpc.Dev-VPC.id

tags = {
Name = "Dev-VPC-IGW"
}
}

STEP 7:
"cd" into the path folder.

STEP 8:
Run the terraform commands.
-init
-validate
-plan
-Apply

STEP 9:
Run the command "terraform state list".
We "list" out resources after the command "terraform apply". Terraform list gives you an overview of what was captured in the state-file. 


STEP 10:
We verified the resources that was provisioned in our console.


Below Steps indicate the changes / Drift by introducing "Tag"

STEP 11:

Lets add "tag" to the VPC and subnet resources created in your console. At this point, we assume that the engineer literally had no idea that the resources were initially provisioned using terraform. 


STEP 12:
 Run "terraform plan" to detect the "drift". This tag was not specified in terraform configuration file. We have leveraged "update in place" which is a kind of terraform resource. 

Terraform does not need to destroy the resources because it has the ability to go in and add the tag without changing the state of the resources. 


STEP 13:
Run "terraform refresh", lets see the action at the level of the state file. Refresh captures all the changes that were made in the console and you see that in your state file not at the level of your configuration file.


STEP 14:

Go into your "vpc-network.tf" file and pass the "env =dev" as a tag name to VPC in the configuration file.


STEP 15:
Run "terraform plan". We have added the changes in the configuration file, thats why there are no changes required. 


STEP 16:
Run "terraform state" list
To destroy a specific resource run "terraform destroy --target <resources>"


We have seen how drift works !! Next slide we will deploy terraform import. Happy Learning !!! ๐Ÿ˜Š

                       https://docs.aws.amazon.com/

Thursday, March 2, 2023

KUBERNETES, AWS EKS, HELM, PROMETHEUS


WHAT IS HELM?
Helm is used to wrap Kubernetes, it is an open source container orchestration. With helm we can install and update application and services in the cluster. 

KUBERNETES:
Kubernetes features are loadbalancing, self-healing, automatic scaling which ensures your applications are responsive to what is expected. 

STEP 1:

Today, we will deploy AWS Elastic Kubernetes services using Helm, as well as configuring helm to automate packages. Helm chart are initial configuration of Kubernetes manifest template which are precreated.

This hands-Requirement:

Kubectl installed, eksctl installed, helm installed.

Install the AWS CLI VERSION 2.10.3 and click this link and download this package.

https://docs.aws.amazon.com/cli/latest/userguide/getting-started-install.html


STEP 2:

Download the Amazon EKS kubectl binary.

STEP 3:

curl -o kubectl https://s3.us-west-2.amazonaws.com/amazon-eks/1.23.7/2022-06-29/bin/linux/amd64/kubectl
chmod +x ./kubectl

STEP 4:

Copy the binary to a folder in your "path".

mkdir -p $HOME/bin && cp ./kubectl $HOME/bin/kubectl && export PATH=$PATH:$HOME/bin

STEP 5:

Verify if it's installed.

kubectl version --short --client

STEP 6:

Install eksctl

curl --silent --location "https://github.com/weaveworks/eksctl/releases/latest/download/eksctl_$(uname -s)_amd64.tar.gz" | tar xz -C /tmp

STEP 7:

Move the extracted binary to /usr/local/bin.

sudo mv /tmp/eksctl /usr/local/bin

STEP 8:

Check if its installed. 

eksctl version

STEP 9:

Run the list command "ls". You should see the kubectl.

ls

STEP 10:

We stall helm package.


sudo yum install openssl -y
curl https://raw.githubusercontent.com/helm/helm/master/scripts/get-helm-3 > get_helm.sh
chmod 700 get_helm.sh
./get_helm.sh

STEP 11:

We ensure that your AWS credentials is configured. Run this command.

aws configure

STEP 12:

We create an EKS cluster. Wait for 20 minutes to provision.

eksctl create cluster  


STEP 13:
Now, we set up EBS CSI add-on for EKS. The add-on allows clusters to manage its lifecycle EBS volumes of persistent volumes. "Replace the EKS cluster name" 

oidc_id=$(aws eks describe-cluster --name my-cluster --query "cluster.identity.oidc.issuer" --output text | cut -d '/' -f 5)
aws iam list-open-id-connect-providers | grep $oidc_id | cut -d "/" -f4
eksctl utils associate-iam-oidc-provider --cluster my-cluster --approve


STEP 14:
Now use eksctl to add this IAM ROLE for the cluster. Replace with "cluster name line 4"


eksctl create iamserviceaccount \
--name ebs-csi-controller-sa \
--namespace kube-system \
--cluster exciting-unicorn-1677698859 \
--attach-policy-arn arn:aws:iam::aws:policy/service-role/AmazonEBSCSIDriverPolicy \
--approve \
--role-only \
--role-name AmazonEKS_EBS_CSI_DriverRole

STEP 15:

Where you see "my-cluster" replace with your cluster name and replace "1112222" to your account ID.

eksctl create addon --name aws-ebs-csi-driver --cluster my-cluster --service-account-role-arn arn:aws:iam::111122223333:role/AmazonEKS_EBS_CSI_DriverRole --force


STEP 16:
Install the Wordpress using Helm.

helm repo add bitnami https://charts.bitnami.com/bitnami


STEP 17:
We install chart is added to Wordpress. The Helm helps you organize your environment using the namespace. 

helm install my-release --set wordpressUsername=admin --set wordpressPassword=defaultpass bitnami/wordpress


STEP 18:
You've successfully downloaded Wordpress from Bitnami's repo.  Let your username is "admin" and pasword "defaultpass"

export SERVICE_IP=$(kubectl get svc --namespace default my-release-wordpress --template "{{ range (index .status.loadBalancer.ingress 0) }}{{ . }}{{ end }}")
echo "WordPress URL: http://$SERVICE_IP/"
echo "WordPress Admin URL: http://$SERVICE_IP/admin"

STEP 19:

You should see two URLs. Log into your admin url with the user ID and password. The url is like the endpoint to connect you to the external IP  and service is the ingress, direct the traffic. The site isn't secure to secure you will need a certificate manager. 

STEP 20:

Now, your Wordpress cluster is using helm. We run the kubctl commands to check your nodes, clusters, namespaces, services. 

kubectl cluster-info
kubectl get nodes
kubectl get pods -o wide
kubectl get svc


STEP 21:

MONITORING WITH PROMETHEUS

Create a namespace for prometheus , add a chart community and deploy prometheus. 

kubectl create namespace prometheus

helm repo add prometheus-community https://prometheus-community.github.io/helm-charts


helm upgrade -i prometheus prometheus-community/prometheus \
--namespace prometheus \
--set alertmanager.persistentVolume.storageClass="gp2",server.persistentVolume.storageClass="gp2"


STEP 22:

Check to see your pod inside Prometheus namespace. 

Use kubectl to "port forward prometheus" console to your local machine through the server "9090".

Go to your local browser "localhost:9090. You should prometheus running. 

Check your prometheus target and see the active metrics to view the running containers. 

kubectl get pods -n prometheus
kubectl --namespace=prometheus port-forward deploy/prometheus-server 9090
kubectl port-forward -n prometheus svc/prometheus-server 9090:80


Congratulations you've successfully deployed Kubernetes integrate with AWS EKS and deploy with helm to organize your deployment using prometheus to monitor the pods. Happy Learning!!๐Ÿ˜Š


Referencing: AWS:  https://docs.aws.amazon.com/

                     Kubernetes : https://kubernetes.io/docs/home/

                     Helm :https://helm.sh/docs/

                    Prometheus : https://prometheus.io/docs/introduction/overview/

                    Kaity leGrande


GRC

  How confident are you in your security program (Tools, systems, controls etc)? In the context of information security , the terms valida...